After months of carefully nurturing your cannabis crops as though they’re your children, it’s time to harvest and eventually cure the flowers. It’s at this crucial step that many talented growers fall apart, and months of labor are wiped out in a matter of days. Harvesting and curing cannabis is an art within the discipline of growing marijuana.
Join us as we detail the necessary steps that will teach you how to harvest and cure cannabis like a pro.
When is it Time to Harvest Cannabis?
As long as you know which strain you’re growing, then you should have a general idea of how long the flowering process should take. If you’re growing from seed, then the breeder should have a range of time that their cannabis strain should be ready to harvest.
For example, if an indica-dominant hybrid has an estimated flowering period of 8-9 weeks, then you should begin counting down the days the moment you flip your lights into 12/12. It’s important to note that this flowering time is a generalized estimate, and your plant may be done sooner or longer depending on its phenotype.
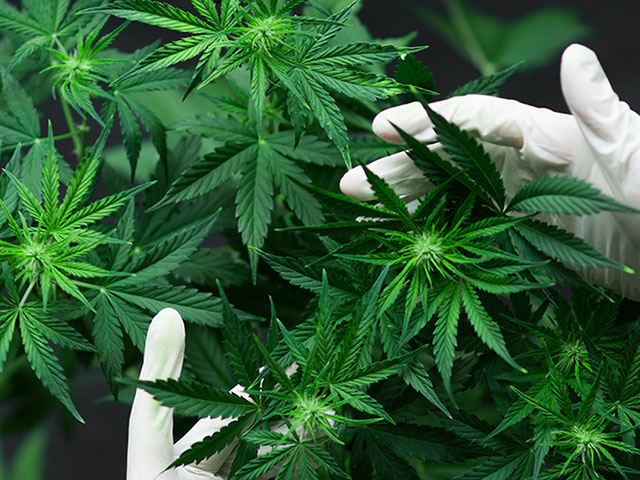
This is why observation is a valuable tool to utilize as a cannabis grower. It’s time to sit down and learn botanical terms, such as pistils and trichomes. Pistils are the “hair-like” threads that are actually the female organ on the cannabis plant. As time goes by, and the female plant isn’t fertilized by male pollen, the pistils begin to wither and change color from white to orange. This is your first clue that harvest time is near.
The second clue is by observing the color of trichomes. Trichomes are the microscopic glands that contain THC, but they exist because of millions of years of evolution that deemed that the female could more easily latch onto male pollen if there were a sticky substance on its inflorescence.
By using a hand-held loupe, you can easily monitor the color of trichomes. Clear trichomes signify that it’s too early to harvest. Once the majority of resin glands change from clear to a more murky and opaque color, then you should be on the alert that harvest time has come.
Once you check throughout the majority of flowers that the trichomes have in fact become mostly opaque, then you can prepare to harvest. Pair this observation with that of the pistil color and the general flowering estimate.
Harvesting Cannabis
If you’re ready to harvest your marijuana, then you’ve made it past the difficult stage of patience and constant worry. This guide is meant to release your anxiety so you can harvest with confidence.
Harvesting requires attention to detail. The moment you shut down your lights, you cross a fine line that means you’re racing against a clock to ensure the quality of your cannabis buds. If you improperly manicure them, their bag appeal will suffer. If you dry them too slow or too fast, they’ll burn unevenly and lose their precious flavor.
Simple Steps to Harvest Cannabis
Didn’t we just say that it’s time to release your anxiety? Follow these steps to ensure that your time and efforts were not in vain.
Step One
Prepare a drying room. If you have the luxury of having a spare room or tent that’s dedicated for drying your bud, then you’re in luck. If you don’t, it’s no matter because your room can double as a drying room as well – except you won’t be able to grow in it until this step is complete.
You’ll need to prepare a means for ventilation, air flow, and masking the smell of cannabis. Similarly to the way you are venting your growing room, you’ll mimic this in your drying room. Depending on the size of your harvest, many oscillating fans may be needed to ensure mold doesn’t ruin your crop.
Create a way to hang your buds still attached to the branches upside down. Clothes hangers are usually the easiest method.
You’ll also need a hygrometer to monitor the humidity level of the drying room to ensure it’s not too high or too low. The sweet spot when drying is 45% relative humidity (RH).
Step Two
Prepare your tools. You’ll need:
- Trimming-specific scissors
- Latex gloves
- Two plastic containers
- Your favorite playlist
Step Three
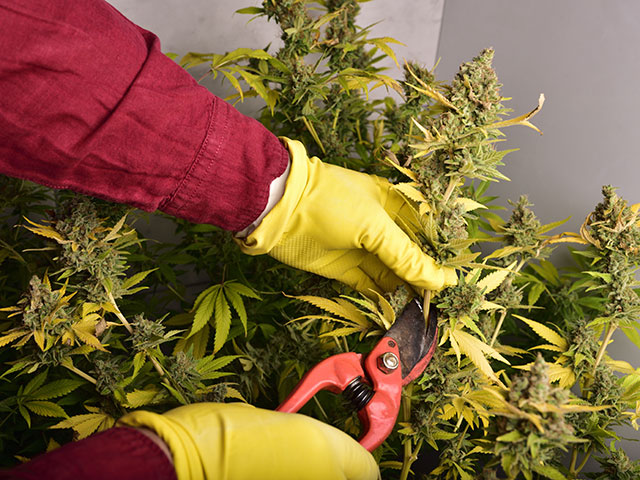
After you’ve cleared a suitable area to trim your harvest, you may begin the process.
- Cut an arm-like size of a lateral branch
- Begin trimming only the large fan leaves
- Continue in this process until you reach the middle and dominant branch
- Repeat until all plant are trimmed
- Place each branch into one plastic container
- Place all the large fan leaves into a separate plastic container
Step Four
In your drying room, you should already have placed a means to hang your cannabis. They should still be attached to their branches, and their small secondary leaves should still be attached.
Hang your buds upside down so that they can easily latch onto a clothes hanger or similar device. Your drying room should be completely dark and ventilated.
Step Five
Patience. Now that you’ve placed your buds into the drying room, you should check on them daily. Depending on the overall yield, density, and environment, your buds can be done drying within 5 days to 2 weeks.
Step Six
There’s such a thing called the “snap test,” which calls for you to bend a branch, and if it makes a snapping sound, then your buds are adequately dry. This is a dated method and is more myth than fact. Feel the buds and press down lightly. If the outside feels dry and the inside feels slightly moist, then your buds are ready for the next step.
Step Seven
Arrange your trimming room as before, but this time, you’ll begin trimming the secondary and small pieces of leaves that are protruding for the buds. This is a much more delicate process and is by far the most time-consuming.
Once complete, make sure you save the trichome-covered leaves in a separate container. As for the buds, you can snip each flower from the branch and place them in a plastic container.
Curing Cannabis
Now that you’ve harvested, dried, and manicured your cannabis, it’s time to add the finishing touch. Curing is responsible for the mouth-watering flavors that we taste, and for the complex aroma that we smell.
Depending on the size of your harvest, you’ll either need a single mason jar or many mason jars. Glass Ball mason jars are ideal to use because glass doesn’t impart any taste on the buds.
Steps to Cure Cannabis
This is the home stretch, and you’ll soon enjoy the fruits of your labor.
Step One
Lightly place your buds in the jar until the jar is full. Do not compress or try to squeeze as many buds as possible into the jar. You want there to be air spaces so that you prevent mold because there should still be a minimal amount of moisture within the buds.
Do this until you’ve stored all your bud into the jar(s).
Once finished, place the jars in a cool, dark area.
Step Two
Each day for the next week or more, you’ll need to open each jar and gently take all the buds out. You’ll notice that they’ve become more moist, as this is because each bud is sharing its moisture with the one next to it, and so forth.
They’re also dissipating CO2, so it’s necessary to allow them to breathe.
After laying them out for 1-2 hours, place them back into the jars. Repeat this process until the buds have stopped becoming too moist, which usually takes roughly 1-2 weeks.
Step Three
Patience, once again. Once you’re sure that the buds are evenly dry, allow them to stay sealed in the containers for 1 month or longer. Occasionally check them to check on moisture and their changing aroma.
Step Four
Enjoy! You deserve it.
